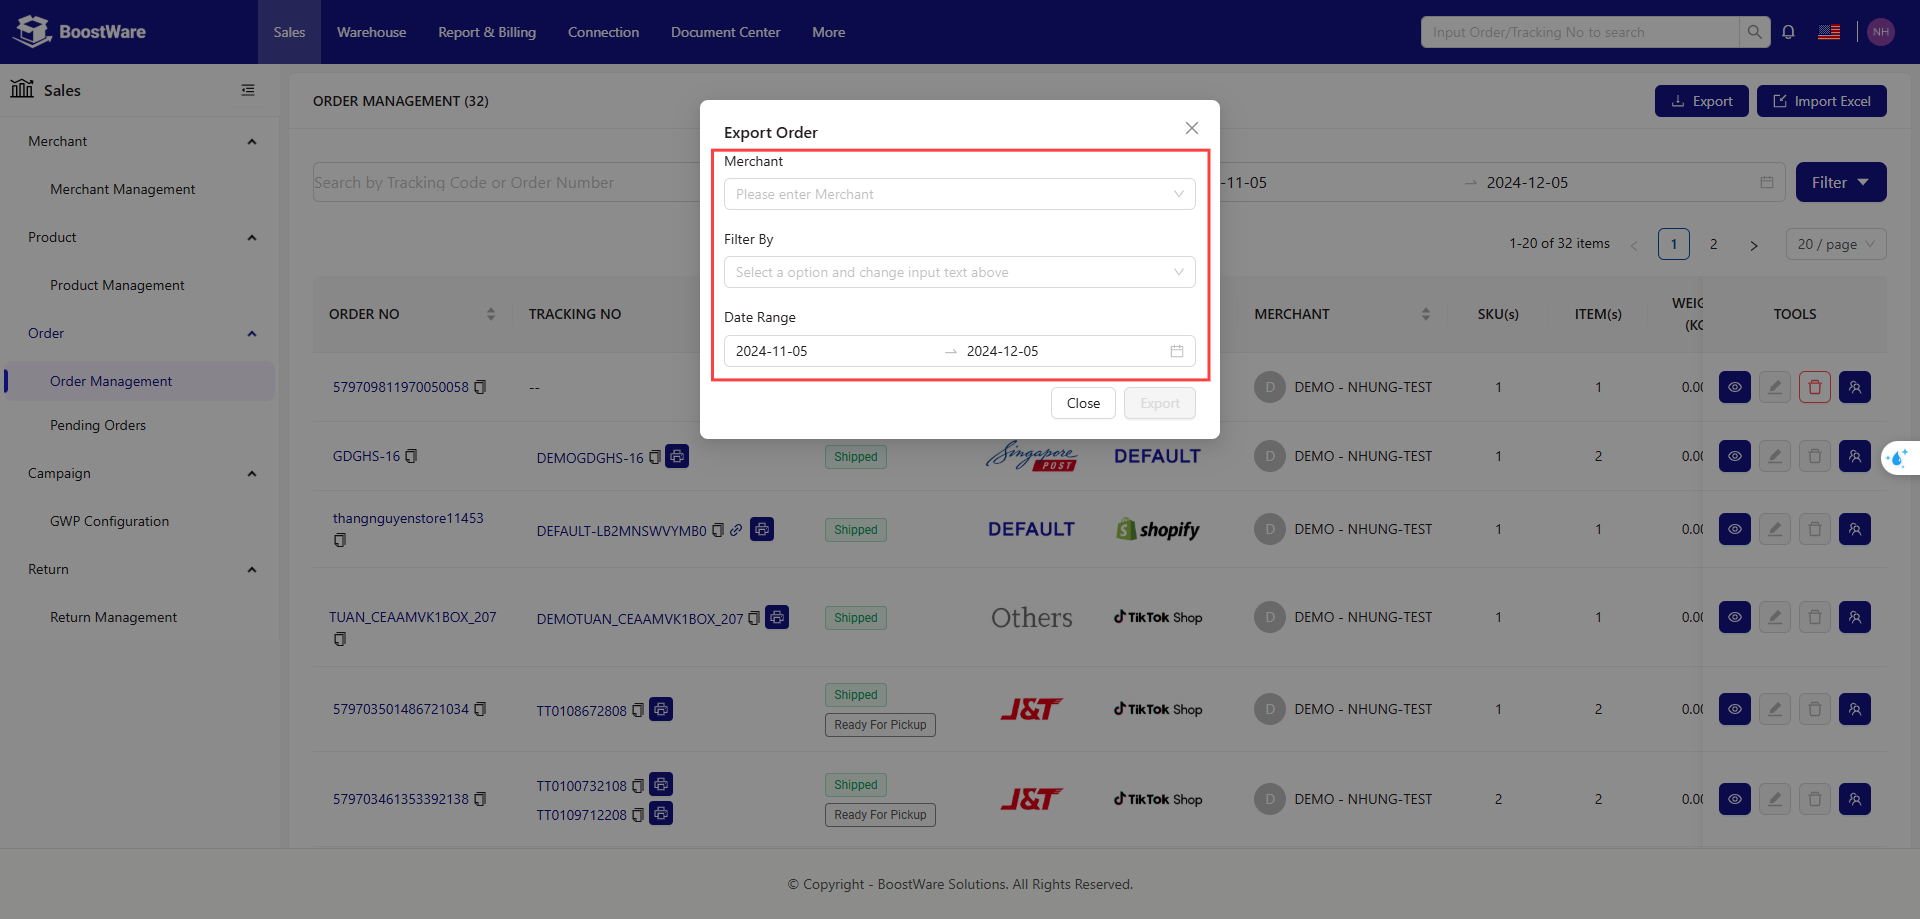
Order Management
The orders page is where you can manage your orders.
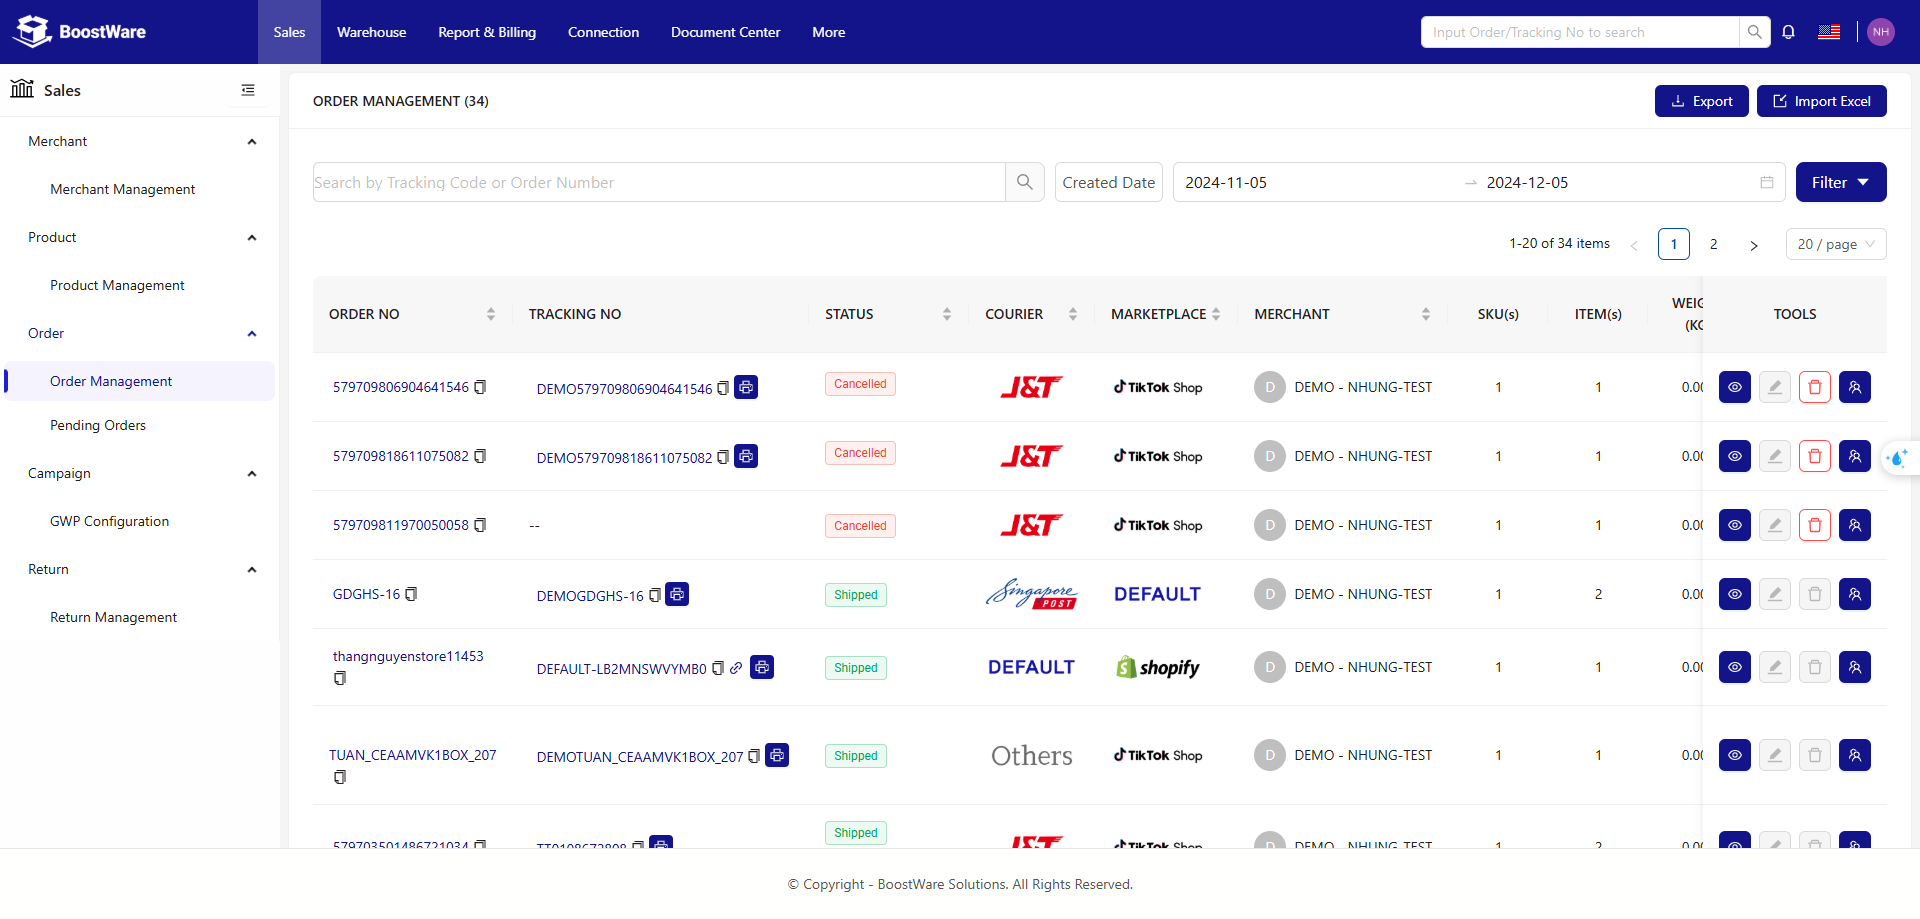
List of Buttons
| Buttons | Description |
|---|---|
.png) |
Download a excel file that shows the filtered list of orders |
.png) |
Start bulk adding new orders |
Creating Orders
Your orders can only be added in bulk.
Bulk Adding
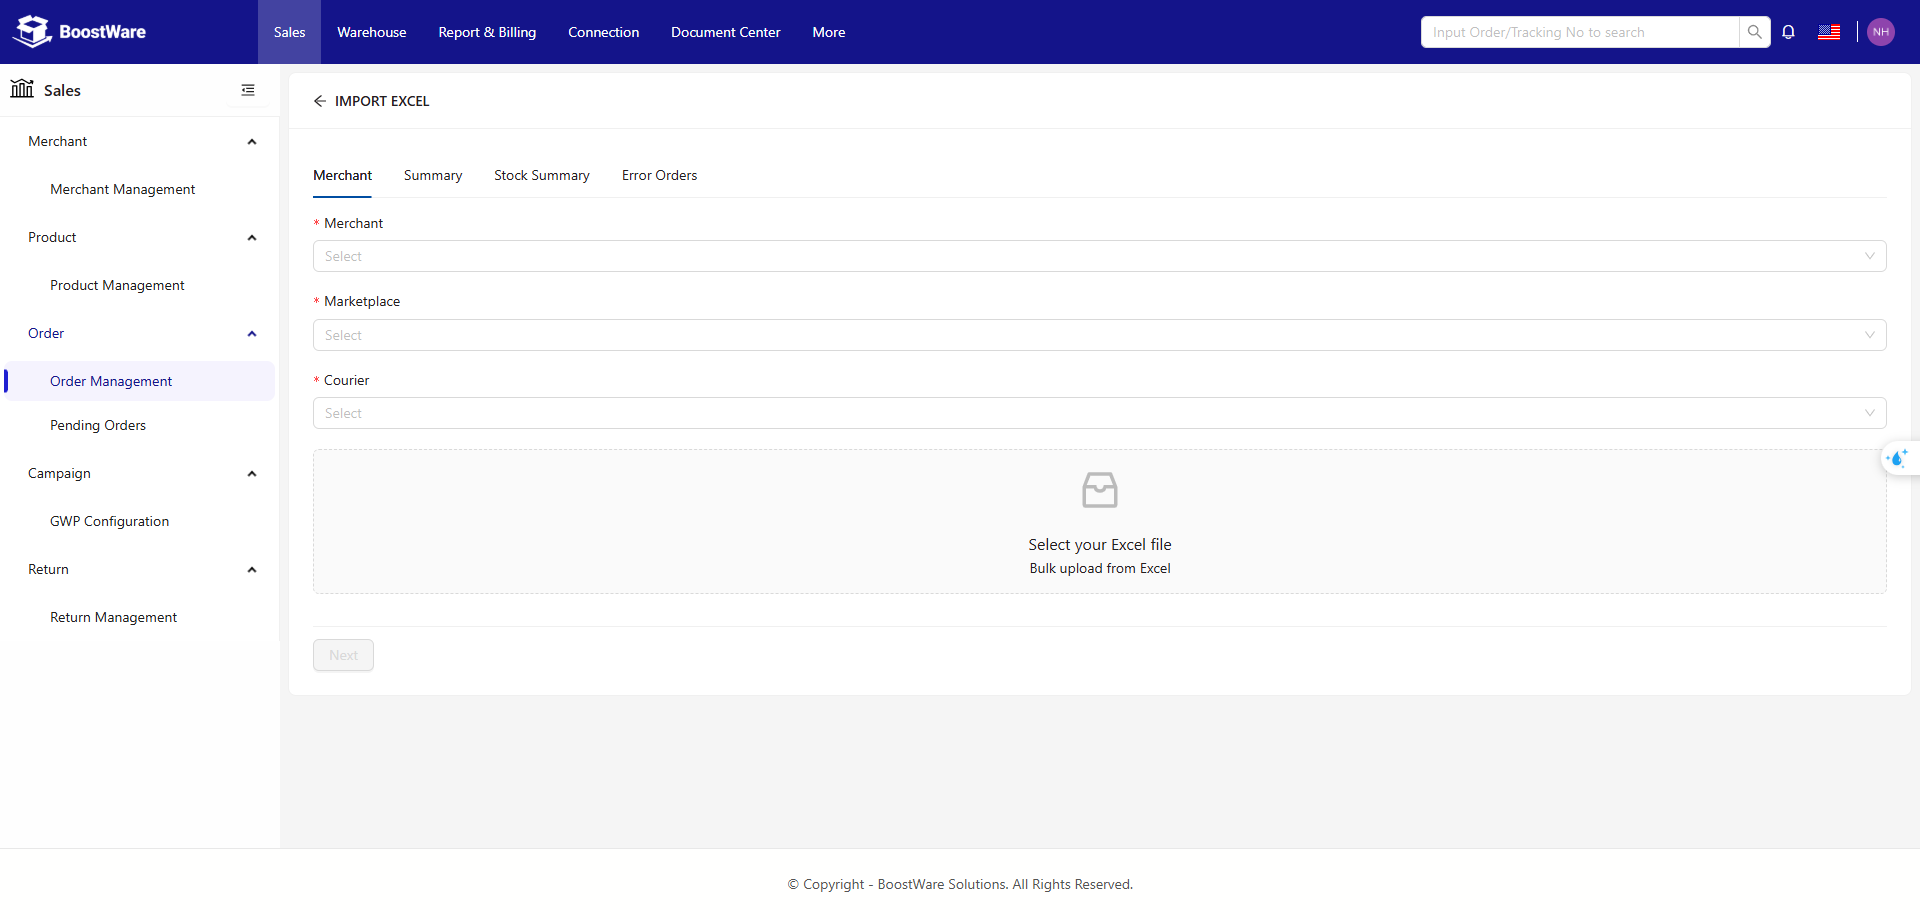
First, choose the merchant whom you want to create the order for, choose the marketplace where your order is being sold, and the courier service that you want to use for the order. After the marketplace has been chosen, an order template specific to the marketplace will be given for you to download and fill up. Fill in the order template and upload it.
For the Default Templace marketplace, refer to the guide below to learn more about the different fields in the template.
For the other marketplaces, the templates correspond to the excel file that you get when you export orders from the respective marketplaces.
You can now proceed to the next page to confirm the order creation.
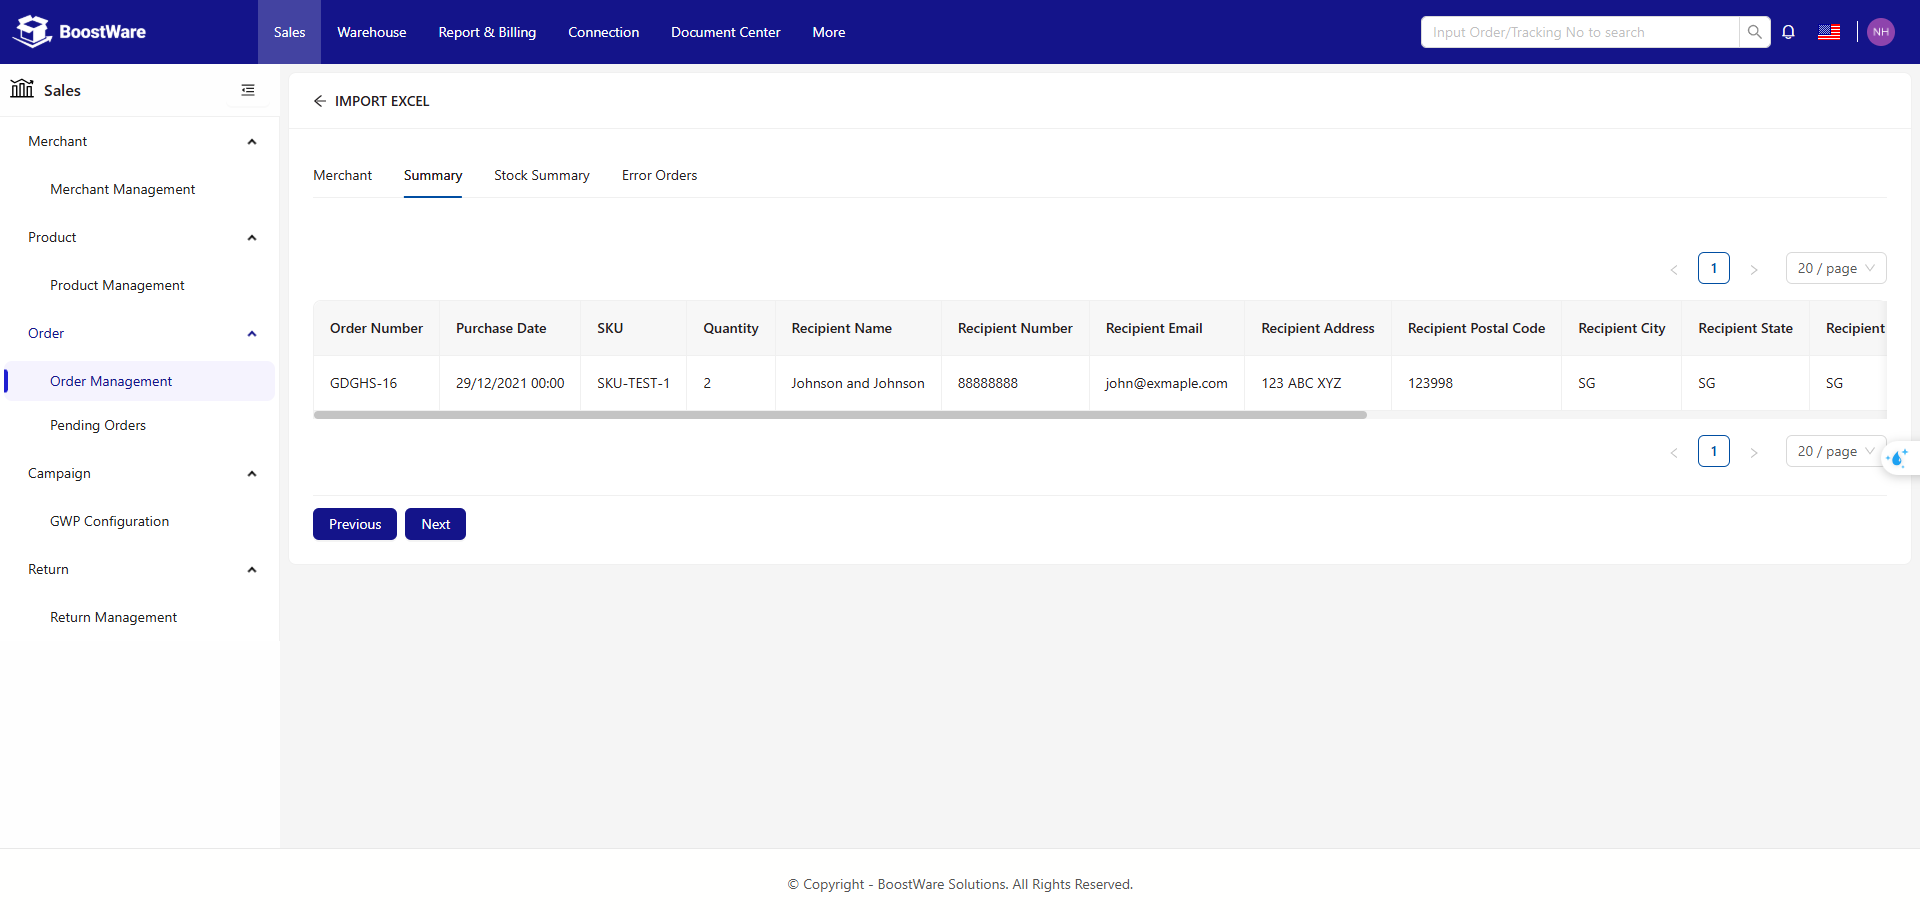
After you have confirmed that order details are correct. You can upload the orders. Then we will help you check the stock of the products for your order.
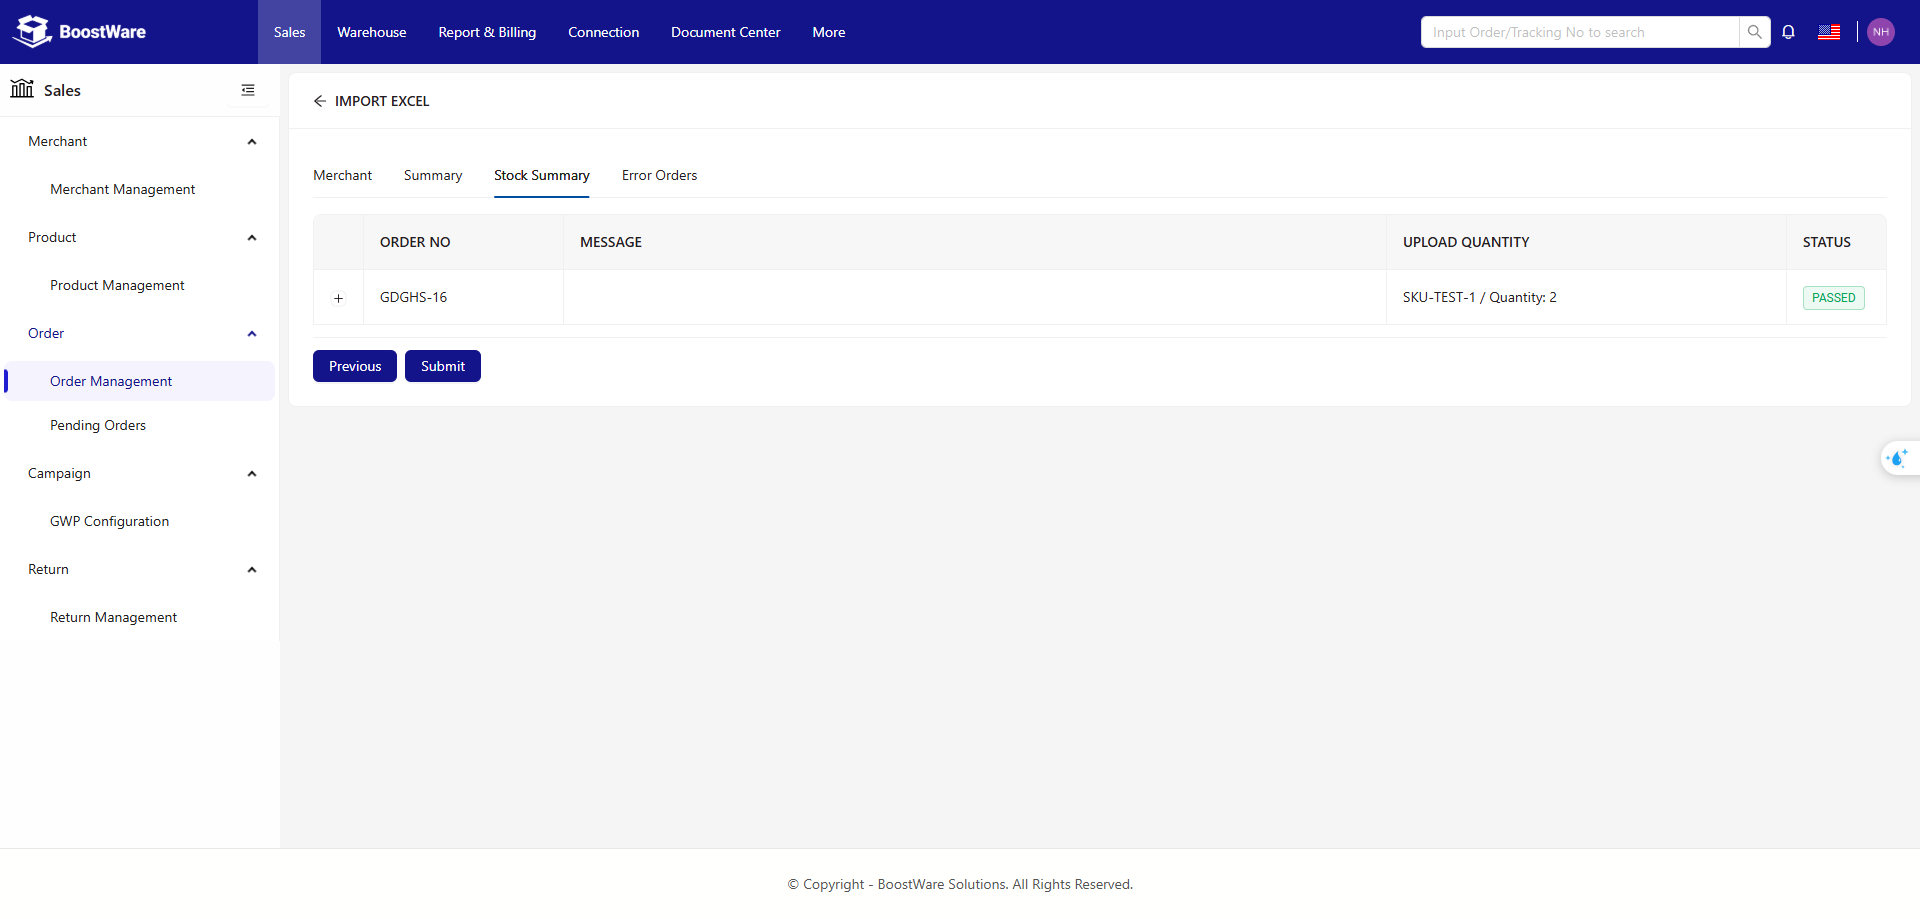
If no/not enough stock is found for your order, you will be given a list of the failed orders. Otherwise, you can submit your bulk orders now.
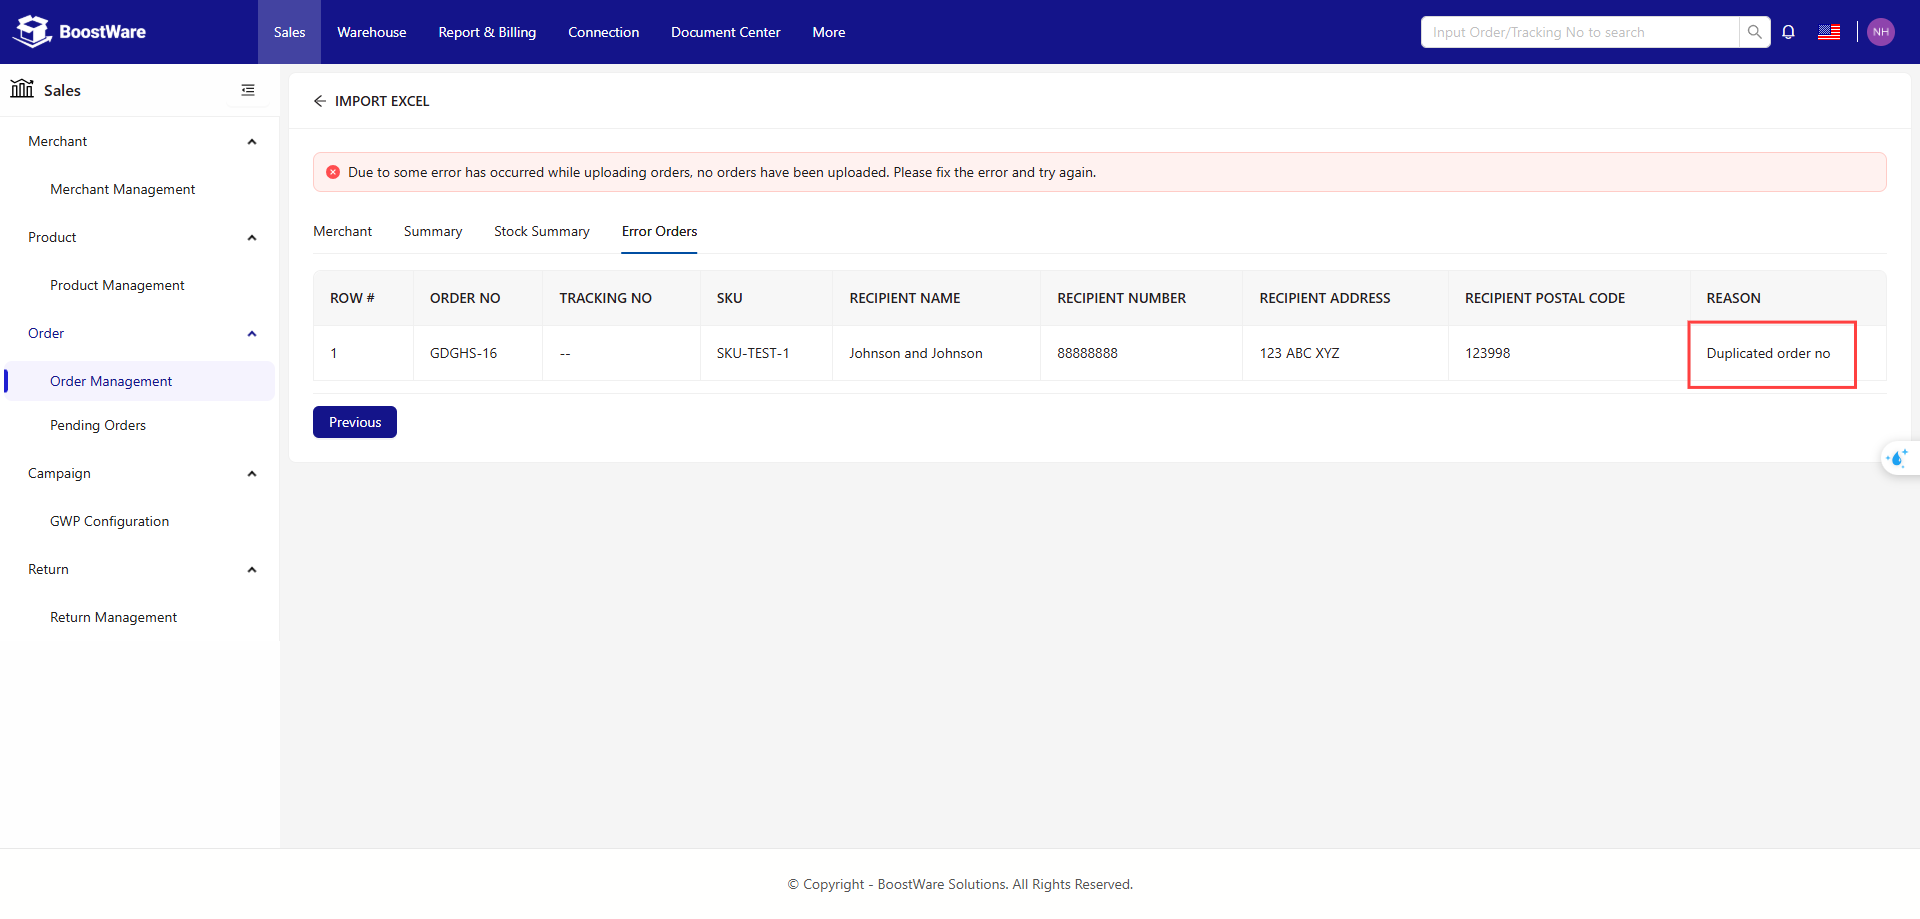
At the error summary page, an error message will be shown for orders that failed its creation process to guide you through adjusting the order template.
Default Template Guide
| Column | Description |
|---|---|
| Order Number | Unique ID for the order. |
| Purchase Date | Date that the order was placed. |
| SKU | SKU that was purchased. |
| Quantity | Quantity that was purchased. |
| Recipient Name | As per heading. |
| Recipient Number | As per heading. |
| Recipient Email | As per heading. |
| Recipient Address | As per heading. |
| Recipient Postal Code | As per heading. |
| Recipient City | As per heading. |
| Recipient State | As per heading. |
| Recipient Country | As per heading. |
| Remarks (optional) | Any additional remarks for the order. |
| Tracking Number (optional) | Tracking number for the order. |
| COD Amount (optional) | Amount of cash on delivery that has to be collected. |
| Is Exchange (optional) | Input "Yes" if this order involves an exchange of goods. |
| Is DO Collection (optional) | Input "Yes" if you require us to collect a DO for this order. |
| Delivery Date (optional) | Date that order is to be delivered. |
Managing Orders
After creating your orders, you can view the details and status of your orders in the order list. You can even provide filters for a more efficient search.
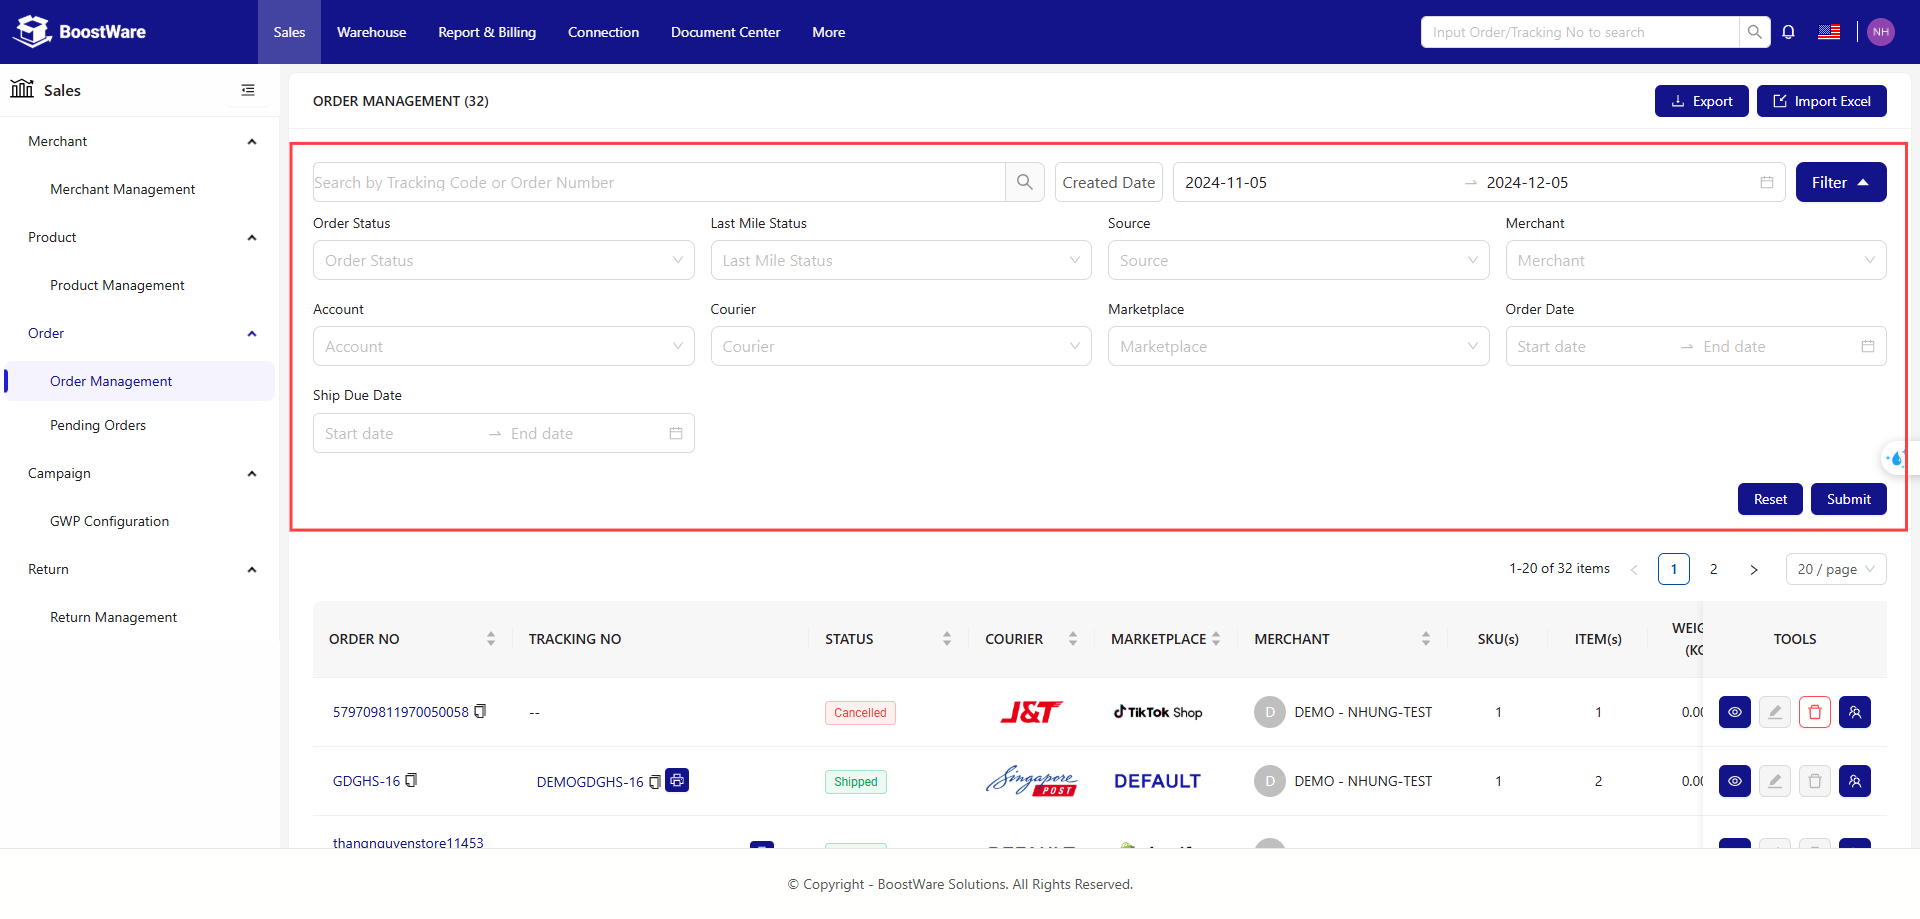
List of Columns
| Column | Description |
|---|---|
| Order No | Your order' identity number |
| Tracking No | Tracking number of order |
| Status | Status of order |
| Courier | Courier company of order |
| Marketplace | Marketplace company of order |
| Merchant | Merchant name |
| SKU in Order | Number of SKUs in order |
| COD Amount | Cash on delivery amount of order |
| Is Exchange | Indicates if order requires exchange |
| Is Do Collection | Indicates if order requires collection |
| Creation Date | The date order was created at |
| Tools | Includes buttons for viewing, editing, and deleting |
Order Statuses
Your orders will have any one of the following statuses that describes the current state of the order.
| Status | Description |
|---|---|
| New | New order awaiting stock allocation |
| Reserved | Stock has been reserved for this order and is awaiting fuliflment |
| Picking | Order is currently being fulfilled by the warehouse team |
| Packed | Order has been packed and is awaiting pickup by 3PL partner |
| Shipped | Order has been transferred to 3PL partner for shipping to customer |
| Cancelled | Order was cancelled |
Exporting Order Data
When exporting product data, you can choose the merchant,. The .xlsx file will then be downloaded onto your device.