3PL Management
Overview
The 3PL Management screen allows users to create and manage connections with third-party logistics (3PL) providers. This feature is essential for integrating with external logistics services, enabling seamless order fulfillment, tracking, and inventory management across systems.
Top Right Section:
- Search Bar: Enables filtering by Merchant to quickly locate specific records.
- Add New Button: Click to add a new 3PL connection.

Main Table Columns
- Merchant: Displays the name of the merchant associated with the 3PL connection.
- Name: The name identifier for the 3PL provider.
- Client ID: Unique identifier assigned to each 3PL client for authentication.
- Courier: Specifies the courier service associated with the 3PL provider.
- Status: Indicates the current status of the connection (e.g., active, inactive).
- Connected At: Shows the date and time when the connection was established.
- Expiry At: Shows the expiration date of the connection, if applicable.
- Tools: Provides options for managing the connection, such as editing or disconnecting.

Steps to Add a New 3PL Connection
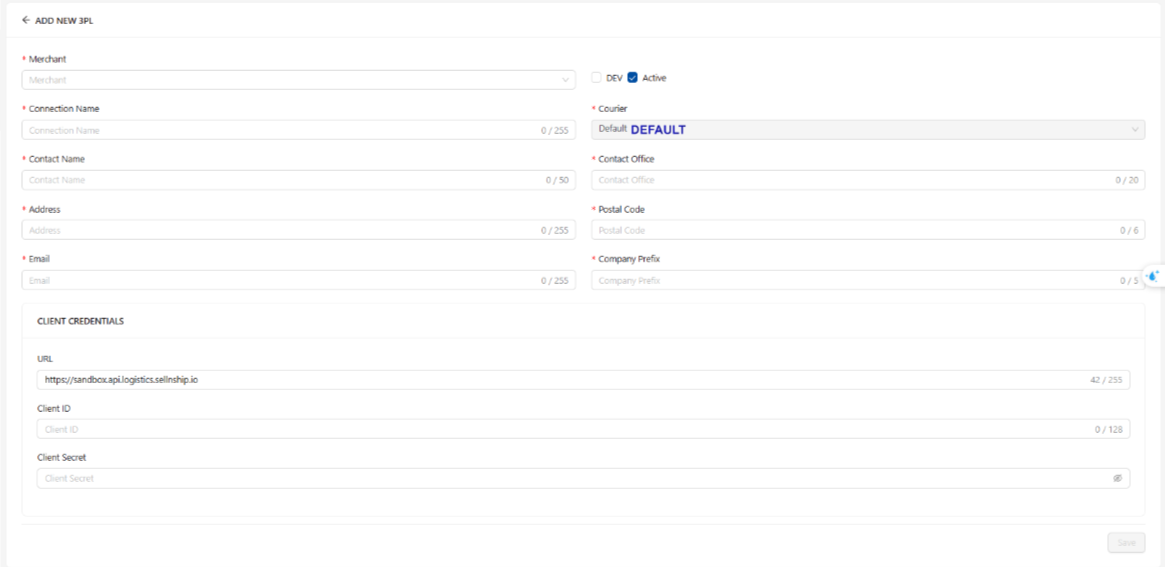
- Click “Add New”: Opens a form to add a new 3PL connection.
- Fill in Required Fields:
- Merchant Name: After selecting the Merchant, the fields Contact Name, Contact Office, Address, Postal Code, Email, and Company Prefix will be automatically filled.
- Enter Connection Name
- Enter URL, Client ID, and Client Secret in the Client credentials section.
- Submit: After entering the details, click Submit to establish the connection.